Advanced Tips for Nuxeo Cloud Customer Console Migration – Part 2
This is Part 2 in a 3-part series focusing on working with Nuxeo Cloud Customer Console in sandbox environments. In this part, we take a look at...
3 min read
 Diego Brito
:
Jan 24, 2024

This 3-part series focuses on working with Nuxeo Cloud Customer Console sandbox environments, high-level strategies for migrating from OpenShift sandbox environments, and the impact on the release process.
Nuxeo Cloud is rolling out a new self-service tool – the Nuxeo Cloud Customer Console. This new tool provides customers with increased visibility and control of their Nuxeo Cloud deployments. Users can now build images from Marketplace packages and schedule pre-production deployments without assistance from the Nuxeo Cloud team.
Besides providing a new home for Nuxeo Cloud sandbox environments, Nuxeo Cloud Customer Console also offers self-service features for collecting thread dumps and configuration files from sandbox and pre-prod environments. The Nuxeo Cloud team provides a great overview of the Nuxeo Cloud Customer Console and its features in their documentation.
It is important to note that OpenShift sandbox environments will be decommissioned in the first half of 2024 and therefore Nuxeo Cloud customers should migrate their sandbox environments to the Nuxeo Cloud Customer Console as soon as possible.
Each Nuxeo Cloud Customer Console environment provides Nuxeo Cloud customers with different levels of control over their deployments. Customers still do not have any control or access to production environments. Pre-prod and sandbox environments allow for image build and deployments and collection of thread dumps and configuration files. The sandbox environment provides the customer with the highest degree of control.
Sandbox environments allow users to build snapshot packages from their code repositories, publish the packages to Marketplace, build an image from the published package, and deploy the image. Users also have a higher level of control over configuration overrides, logging configuration, and access to operations that collect thread dumps and configuration files.
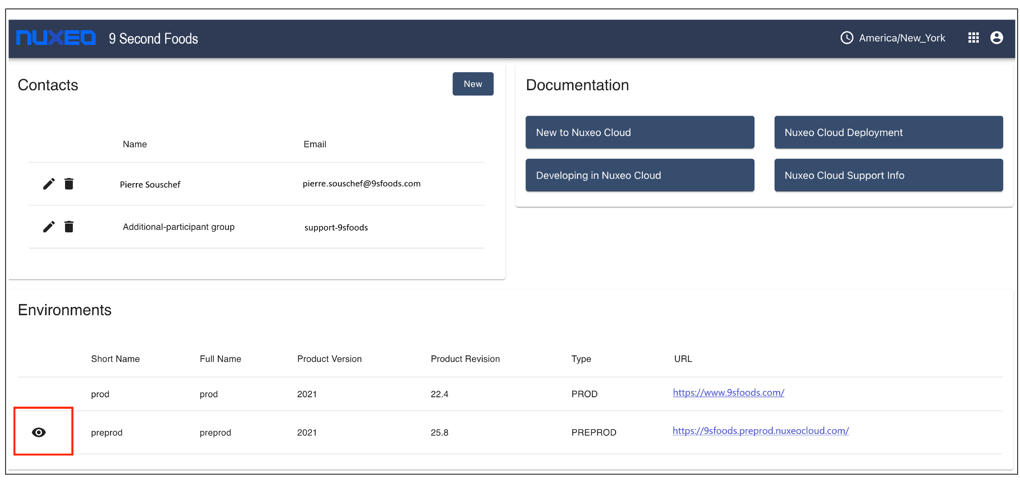
1. Navigate to an environment’s details view by clicking the 'eye' icon on the left side of the Environments dashboard widget. Sandbox environments will usually have a name like ‘dev’ or ‘test’.
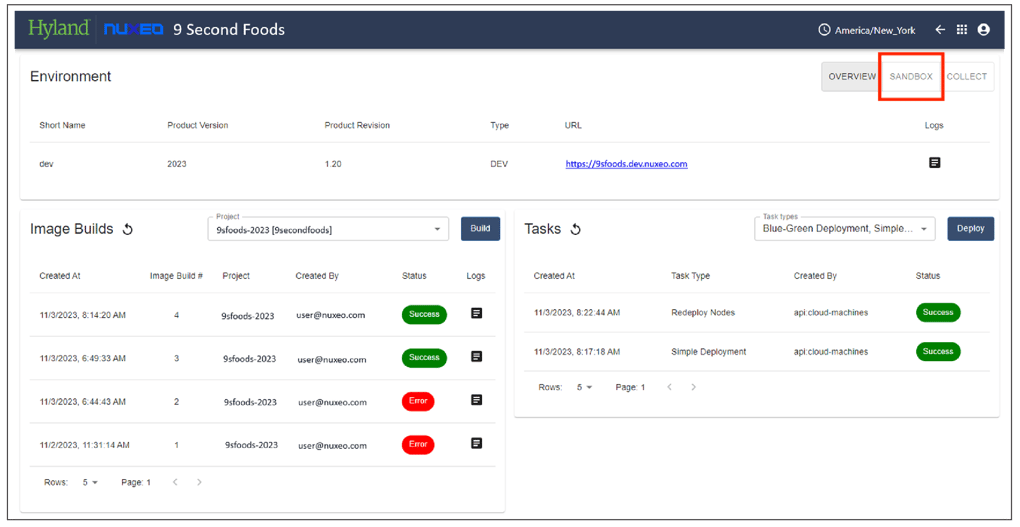
2. Sandbox environments have a 'sandbox' tab in the upper right corner of the environment details view. Click this tab to navigate to the sandbox configuration view.
3. In the sandbox configuration view, there is a widget called 'Package Builds.' This is the widget we will use to configure our connection to our code repository.
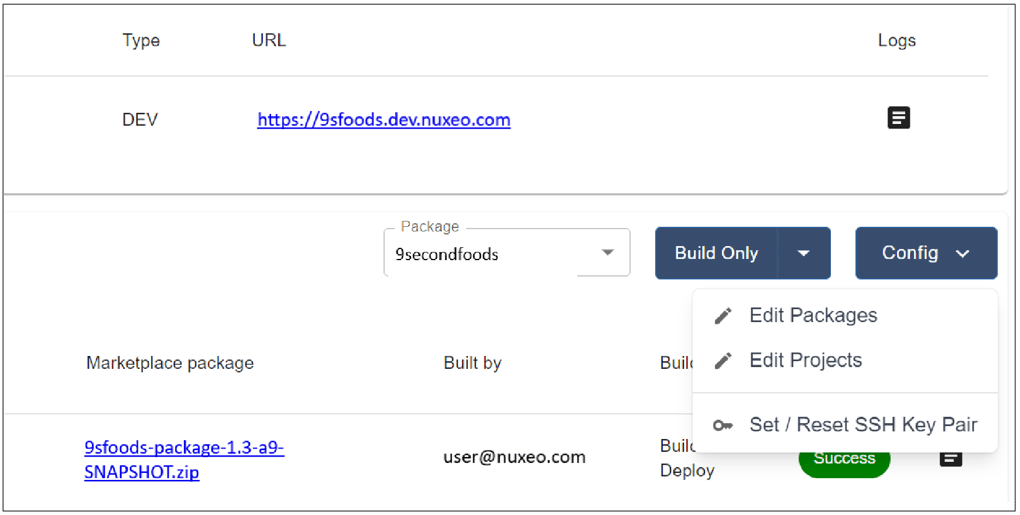
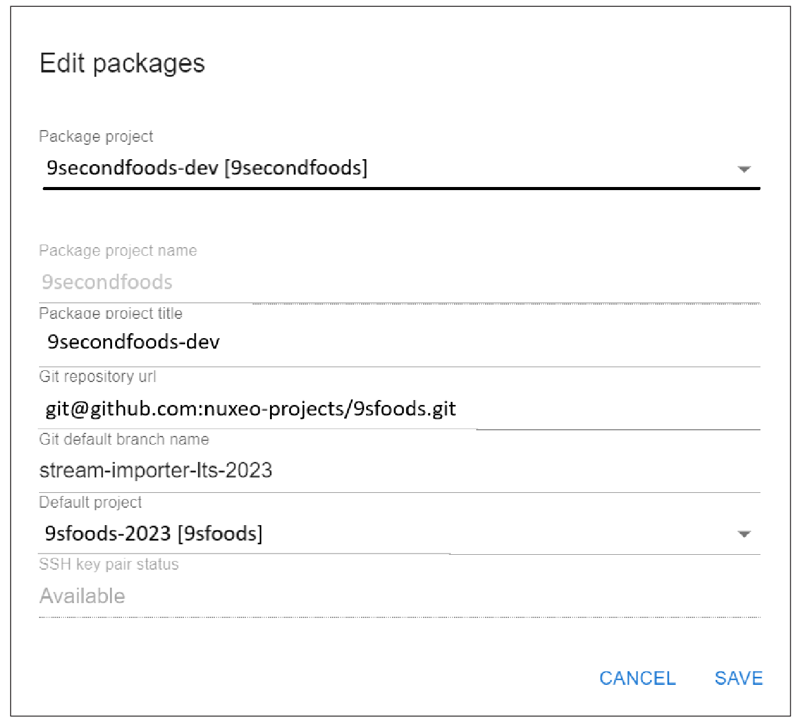
4. Once the SSH credentials are configured and the Package Build is pointing at the correct repository and branch, you can execute a package build and optionally deploy the package.
The build button has a dropdown on the right side of the button. Use this dropdown to switch between Build Only and Build and Deploy.
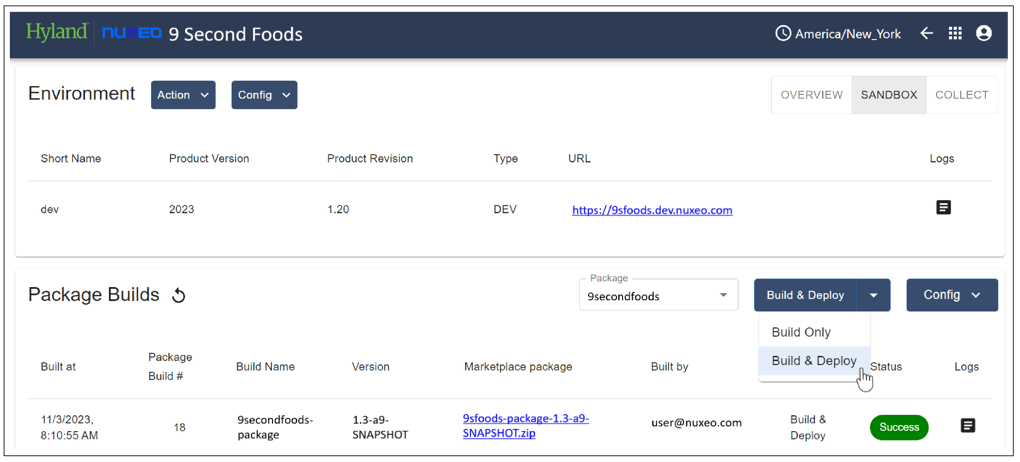
5. The status of a running package build can be checked by clicking on the 'Status' column of the package build in question. The build log can also be viewed and downloaded by clicking the 'Logs' column. If you selected Build & Deploy, the status of the image build and environment deployment can be viewed individually by selecting the Overview tab in the top right.
6. Barring any issues connecting to the code repository, running unit tests, or uploading to Marketplace, the build should be completed without issue. I encountered a few failures that are worth mentioning:
In Part 2 of this special series on The Nuxeo Cloud Customer Console, we take a deep dive into high-level migration strategies.
About the Author
Diego Brito is a Software Engineer and Consultant at Genus Technologies. Diego is passionate about developing enterprise software in the Content Services space. Throughout his career, Diego has developed a deep understanding of the Nuxeo Platform and works on the Genus team identifying market needs, content services, and solutions for Nuxeo customers, as well as contributing add-ons to the Nuxeo Marketplace. Connect with Diego on LinkedIn!
Get more useful content, expert tech tips, and timely articles delivered to your inbox ~ Subscribe to Genus Blogs!

This is Part 2 in a 3-part series focusing on working with Nuxeo Cloud Customer Console in sandbox environments. In this part, we take a look at...

This is the final blog in a 3-part series focusing on working with Nuxeo Cloud Customer Console in sandbox environments. In this part, we explore how...

The Genus Nuxeo Practice has performed a variety of Nuxeo integrations with systems that produce JSON as an API output. As a result, we werefrequently